Why You'll Love It
- - Simplicity: just five ingredients and one pan
- - Speed: ready in under half an hour
- - Comfort: rich, buttery crust with a creamy topping
- - Versatility: perfect for holidays or a quick weeknight treat
*"I made this for my teenage grandkids and they ate it straight from the pan – pure joy in every bite!"*
Essential Ingredient Guide
- Oreo cookies: Use full‑size cookies; their chocolate flavor and creamy filling form the base and topping.
- Unsalted butter: Melted butter creates a glossy, rich crust that holds the cookie pieces together.
- Canned vanilla pudding mix: Adds a smooth, custardy layer that balances the chocolate crunch.
- Milk: Needed to activate the pudding mix; choose whole milk for extra creaminess.
- Whipped topping (or cool whip): Spread on top for a light, airy finish that softens the cookie edges.
- Optional sprinkle of sea salt: A pinch can heighten the chocolate flavor and cut sweetness.
Complete Cooking Process
-
Ingredient Readiness:
Gather all five items, measure the butter, and have the pudding mix ready to whisk.
-
Flavor Development:
When the butter melts, it releases buttery aromas that meld with the Oreo’s cocoa notes.
-
Texture Control:
Allow the pudding to set before adding the whipped topping – this keeps the crust crisp.
-
Finishing Touches:
Spread whipped topping, add a dusting of crushed Oreo crumbs, and let the cake cool slightly.
-
Serving Timing:
Serve warm from the oven or at room temperature; the contrast of warm crust and cool topping is delightful.
- Use room‑temperature butter for an even melt
- Do not over‑mix the pudding; a gentle stir preserves airiness
- Let the cake sit 5 minutes after baking for the topping to set
- Serve with a scoop of vanilla ice cream for extra indulgence
Pro Tips
These small steps can make the difference between an ordinary dump cake and a memorable dessert. I often find that letting the cake rest just a few minutes lets the flavors settle, and the texture becomes perfectly tender. So, take a breath, enjoy the simple process, and share the result with loved ones.
The essence of the dish:
A fun fact or historical angle:
Flavor or sensory focus:
You Must Know
- Use a metal baking dish for even heat distribution
- Do not over‑bake; 15‑20 minutes is enough
- Allow the cake to cool just enough to slice cleanly
Frequently Asked Questions
→ Can I use gluten‑free cookies?
Yes, replace Oreo cookies with a gluten‑free chocolate sandwich cookie; the texture will remain satisfying.
→ Do I need to pre‑heat the oven?
Set the oven to 350°F (175°C) before starting; a pre‑heated oven ensures the butter melts evenly.
→ How long can leftovers be stored?
Cover and refrigerate for up to three days; reheat gently or enjoy cold.
→ Is there a dairy‑free version?
Swap butter for a plant‑based alternative and use coconut‑based whipped topping.
→ Can I add fruit toppings?
Fresh strawberries or bananas pair beautifully; add them just before serving.
→ What’s the best serving size?
A ½‑cup portion offers a balanced bite of crust, custard, and topping.
Chef's Tips
If you prefer a firmer crust, increase the butter by one tablespoon.,For a richer flavor, add a splash of vanilla extract to the pudding mixture.,Serve warm for the best contrast between the soft center and crisp edges.
Nutrition Facts
per serving
420
Calories
5g
Protein
48g
Carbs
22g
Fat
Taste Profile
Rich chocolate sweetness balanced by creamy vanilla
Ingredient Substitutions
Don't have an ingredient? Try these alternatives
May affect flavor slightly; choose a buttery variety for best taste
Adds a light coconut aroma; ensure it’s stabilized
Recipe Variations
Try these delicious twists on the original
Spicy Version
Add ½ teaspoon of cinnamon and a pinch of cayenne to the melted butter for subtle warmth.
Mediterranean Style
Swap the pudding for a honey‑yogurt mixture and top with crushed pistachios.
Common Mistakes to Avoid
Learn from others' mistakes for perfect results
- Over‑mixing the pudding, which makes it dense
- Baking too long, leading to a dry crust
- Adding whipped topping before the cake is done, causing it to melt
Meal Prep & Storage
Make Ahead Tips
You can crush the cookies and melt the butter ahead of time; store them separately and combine when ready to bake.
Leftover Ideas
Reheat gently in a skillet over low heat, covering to retain moisture, or serve chilled with a dollop of fresh whipped cream.
Perfect Pairings
Serve this with...
Cooking Timeline
Preheat oven and prepare baking dish
Crush cookies and melt butter, combine for crust
Whisk pudding mix with milk, pour over crust
Bake until edges are golden, then add whipped topping
Rest, garnish, and serve
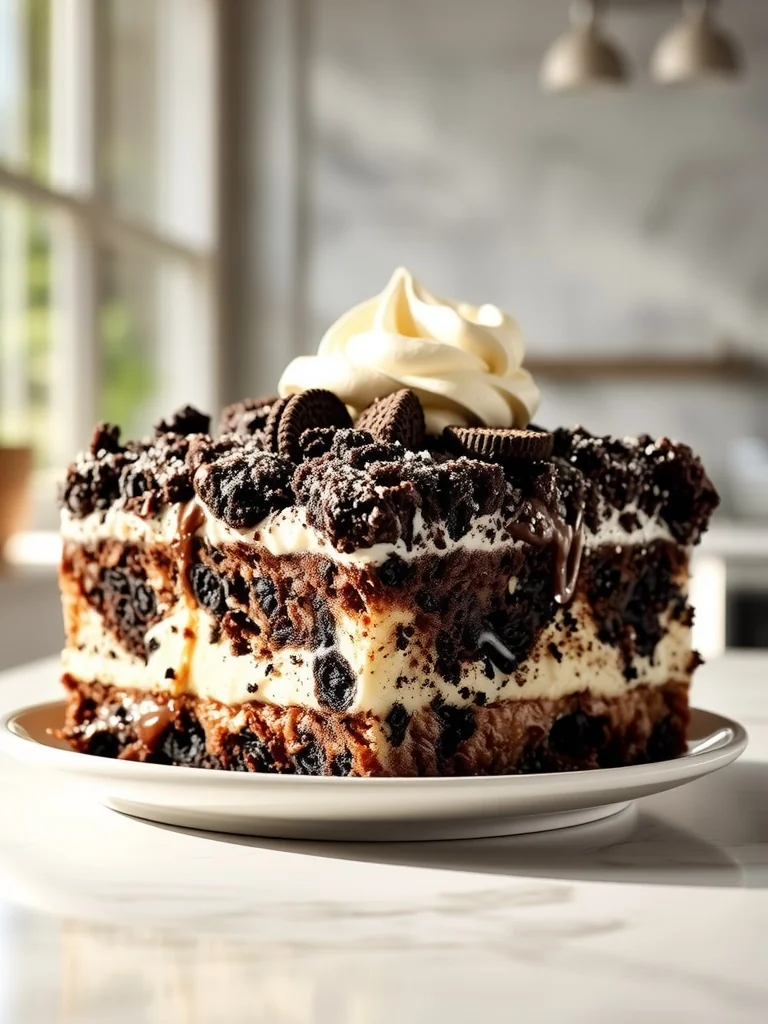
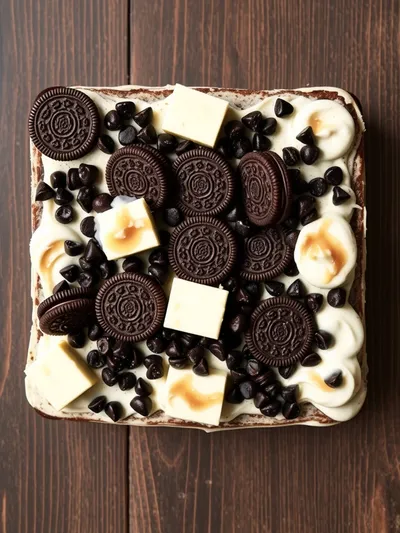
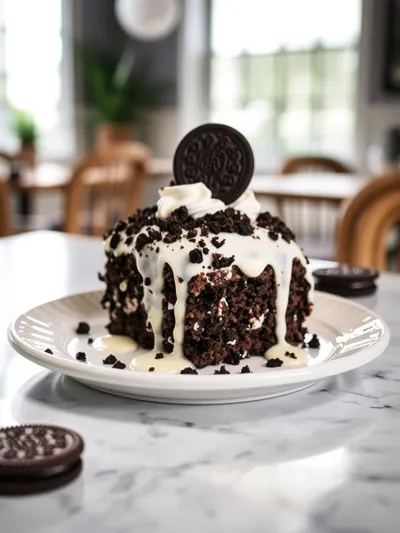
Oreo Dump Cake – 5 Ingredient Quick Dessert
Indulge in a super‑simple Oreo Dump Cake made with just five pantry ingredients – ready in minutes for a sweet, crunchy dessert.
Timing
Prep Time
10 Minutes
Cook Time
20 Minutes
Total Time
30 Minutes
Recipe Details
Ingredients
Base and Topping
- 01 1 ½ cups (about 24) Oreo cookies, crushed
- 02 ½ cup unsalted butter, melted
- 03 1 (3.4‑oz) package instant vanilla pudding mix
- 04 1 ½ cups cold milk
- 05 1 cup whipped topping (or cool whip)
Instructions
Pre‑heat the oven to 350°F (175°C). Lightly grease a 9‑inch square baking dish.
Place the crushed Oreo cookies in the bottom of the dish, pour the melted butter over them, and gently press to combine, creating an even crust.
In a bowl, whisk together the instant pudding mix and cold milk until smooth; pour the pudding over the cookie crust, spreading evenly.
Bake for 15‑20 minutes, until the edges are lightly golden and the pudding is set. Remove from oven and immediately spread the whipped topping over the warm cake.
Allow the cake to rest for 5 minutes, then dust with a few extra crushed Oreo pieces before serving.
Notes & Tips
- 1 If you prefer a firmer crust, increase the butter by one tablespoon.
- 2 For a richer flavor, add a splash of vanilla extract to the pudding mixture.
- 3 Serve warm for the best contrast between the soft center and crisp edges.
Tools You'll Need
-
9‑inch square baking dish
-
Mixing bowl
-
Whisk
-
Measuring cups and spoons
-
Plastic bag for crushing cookies
-
Spatula
Must-Know Tips
- Don't overcrowd the pan; spread cookies evenly
- Let the cake rest before slicing so the topping sets
- Taste as you go – adjust sweetness with a pinch of salt
- Use room‑temperature butter for a smoother crust
Professional Secrets
- Room temperature butter, ensures even coating of crumbs
- Bake on the middle rack for uniform heat
- Allow the cake to steam briefly after baking for a tender interior

Recipe by
kendraKendra is the culinary heart behind Your Website, where she blends classic American comfort food with fresh, seasonal twists that keep readers coming ...
Get Delicious Recipes Weekly
Join 25,000+ home cooks getting our best recipes straight to their inbox.
Free forever • No spam • Unsubscribe anytime